Date Published: 2016-03-10
Three Primitive Skills You Should Know
By Adelia Ladson
 Animal Hide can be used to make glue.
 You need to find a silica based rock.
Shop All Field and Survival Gear Here If I’ve said it once, I’ve said it a hundred times, “You need to be prepared.” Being prepared, though, doesn’t stop at collecting supplies. A good prep encompasses acquiring knowledge and learning skills, too. Skills will hold you in good stead when your supplies run out or low or are destroyed somehow. Being able to perform some primitive skills is important for survival. Primitive skills are what the human race was built on and if it all falls apart, they may be needed again.
1. How to Make Hide Glue
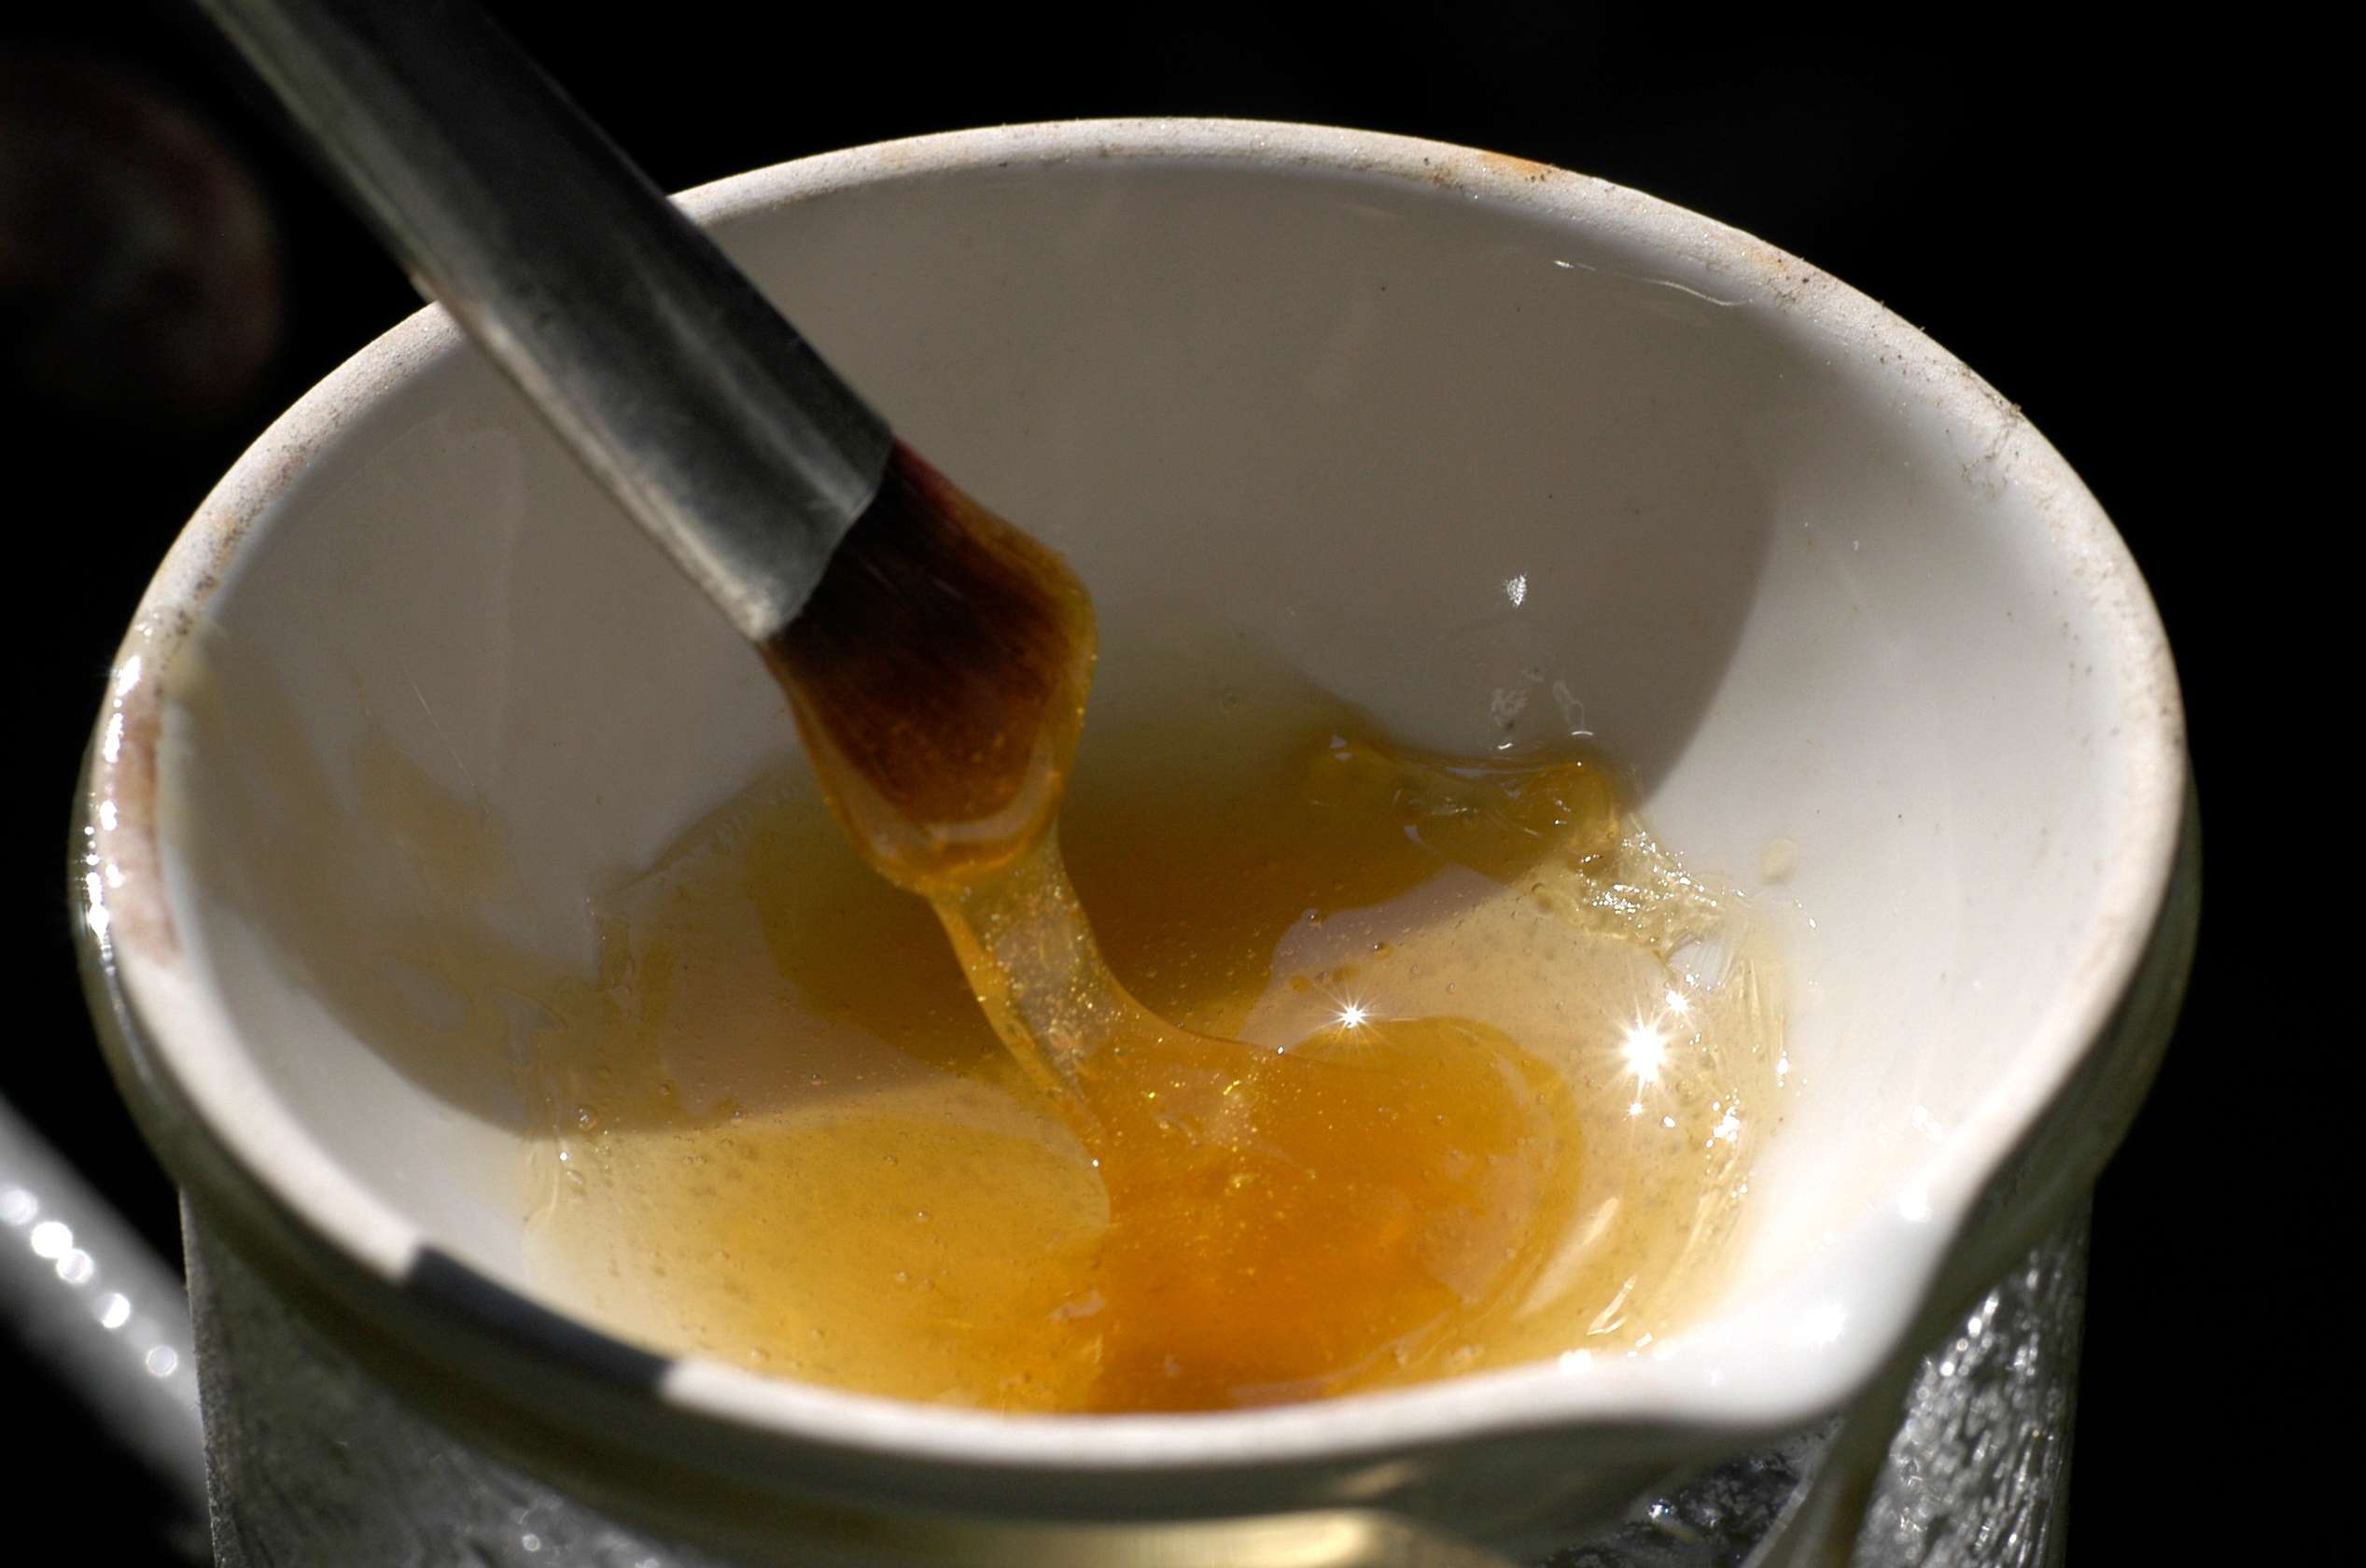
Our ancestors made and used hide glue for a variety of things through the ages including mending pottery, binding feathers to arrows, binding thin pieces of wood together and adding it to their paints to protect their works from moisture.
So, basically, to make it yourself, you need animal connective tissue which can be skin, bone and tendons. The easiest method that I’ve found is boiling down animal hides but they have to be scraped completely clean. First, cut the hide into really small pieces, then, take an old pot (one you don’t care about) and put the small pieces in with water covering them completely. Bring them to a slow boil and then allow them to simmer for a couple of hours (uncovered) or so before taking a look at them. The hide pieces will swell up a little and look sort of translucent when they’re ready. If not, check on them later but don’t let the water simmer out or they’ll burn just like anything else. NOTE: It will not smell really nice so you might warn your family before you get started.
Animal Hide can be used to make glue. What you want, after the hides are “done” is the liquid from them because this is your glue in its early stages. Use an old metal strainer to strain out all the hide bits that you can and once again, use one you don’t really care about or buy one specifically for this purpose. Return the liquid to your pot and let it simmer until it starts to thicken up, then, remove it from the heat. When it’s cool enough to touch, test it’s stickiness with our fingers. If it isn’t sticky, put it back on the stove to simmer some more. What you’re doing is cooking off the excess water. Don’t scorch it because it will really smell bad then.
Once it’s reached a sticky consistency, use pantyhose or something else with a similar fiber structure to strain out the liquid completely of the fine particles. Use a wide, flat container like a tin foil pie plate to strain the liquid into. Let the glue cool completely until it’s congealed into a rubbery consistency. Use your fingers to break it into small pieces and spread them out to dry in a cool, moisture-free place. Repeat this every day, and you can use a knife to further chop them up, until the bits are completely dry. NOTE: If they are not completely dry, they will mold when you try to store them. Once they are in a dry, crystal-like form, you can store them in a water-proof container.
When you want to use the glue, just take out what you think you’ll need and rehydrate it to the sticky consistency you need. Add the water slowly and warm it on the stove slowly but don’t boil it. The less water, the thicker you’re glue will be. After you use it on whatever you are binding, let is dry for several days so that it will set completely in your project. Please, remember, that hide glue is water soluble, so choose what you use it on wisely.
2. How to Make Cordage from Plants
This is another primitive skill that may come in handy someday and it’s just really cool to learn, especially, if you’re looking for an alternative and practical hobby. There are a variety of plants which you can make cordage out of including Dogbane, Milkweed, Hemp (obviously), Cattail leaves, Yucca leaves, Agave leaves, Willow bark, Maple bark and Cedar bark. There’s more out there. Just look what you have available to you and search the internet to see if it’s suitable. Just to pick one, we’ll talk about using dogbane (also called Wild Cotton), which can be found throughout most of North America. NOTE: It is extremely poisonous if ingested, like stop your heart poisonous.
Use dogbane stalks that are brown, not green or gray and look for about a 4-foot stalk. Then, break it off at the bottom and break-off and discard the top to get about a three-foot stalk. Flatten the stalk to break the core inside and separate it into two equal halves. Then, starting at the thick ends, snap off about an inch-long section. You can now start removing the core wood inside by pulling up one end and then the other to avoid peeling. Do this for both halves and you end up with two ribbons of fiber with a dark brown outer bark. To get into shape, grind each ribbon between your thumb and forefinger, which will cause the fibers to separate a little. Now, you should have two strands that get thinner along their lengths. You want a consistent width so reverse on strand and lay it against the other so that the width becomes more or less consistent, then rub the strands together so that they stay connected to each other. You now have something to work with.
Use dogbane stalks that are brown, not green or gray and look for about a 4-foot stalk. Then, break it off at the bottom and break-off and discard the top to get about a three-foot stalk. Flatten the stalk to break the core inside and separate it into two equal halves. Then, starting at the thick ends, snap off about an inch-long section. You can now start removing the core wood inside by pulling up one end and then the other to avoid peeling. Do this for both halves and you end up with two ribbons of fiber with a dark brown outer bark. To get into shape, grind each ribbon between your thumb and forefinger, which will cause the fibers to separate a little. Now, you should have two strands that get thinner along their lengths. You want a consistent width so reverse on strand and lay it against the other so that the width becomes more or less consistent, then rub the strands together so that they stay connected to each other. You now have something to work with.
Here is an up close look at the twisting process.
About a quarter of the way down your strand of fiber, twist a segment in opposite directions until it makes a tight kink and this will be one end of your rope. Hold this loop tightly with your left thumb and forefinger so that you have two strands (one will be shorter). With your right thumb and forefinger twist the strand that is further away from you clockwise so that it’s tight but not kinking up, then, use your right middle finger to clamp the strand that is closer to you to your right forefinger. Turn your wrist 180 degrees back towards you so that you are swapping the positions of the strands. Push up a little on the junction between the two strands with your right forefinger to keep the wrap tight. Just keep doing this until you run out of length. Now, this is just the basics of the technique. To make your rope longer, you “splice” in more fiber to the shorter strand by just adding another prepared fiber strand to it and continue the twisting process.
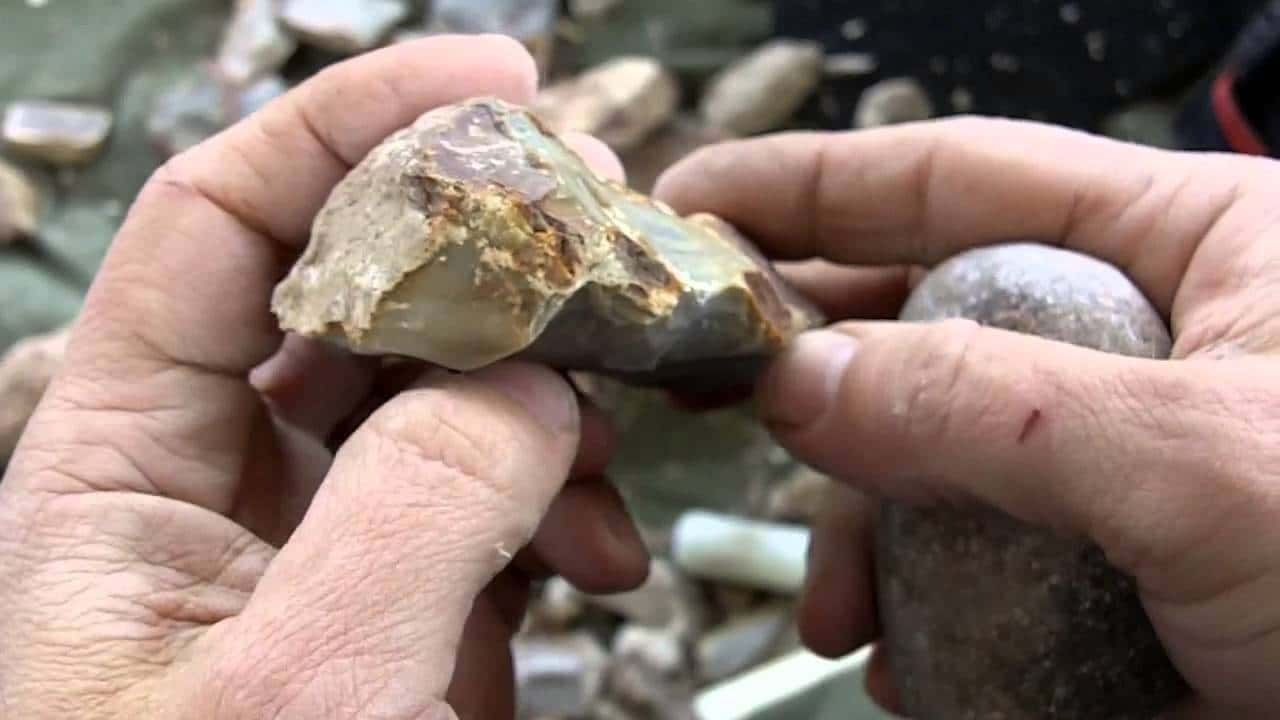
3. How to Make a Knife from Stone
Making a knife out of rock was probably one of the first things primitive man perfected because having a sharp instrument is a necessity for survival. This is something that actually takes a little more finesse as you try to break the rock just right to form the most promising shard that can be shaped into a sufficient knife. It’s not easy and takes practice.
You need to find a silica based rock. First off, you have to find a rock that is suitable like flint, obsidian, quartz, basalt or jasper – basically any rock that has silica in it. Then, you need a hammer stone, which should be a medium sized rock (none silica based) that has a rounded surface and is free from cracks. A round granite river rock makes a good one. Take the hammer stone in one hand and the flint rock or whatever you’re going to “flake” in the other. Now, I have seen it done both ways. You can hold it in your hand or brace it on your thigh but you need to make a strike that follows all the way through without stopping. Strike down on the edge of the knife rock with the hammer stone, and if you’re lucky, you will flake off a nice size piece of it. The bigger the knife stone, the larger the flake. NOTE: The edge of the flake that separated from the rock will be razor-sharp. So be careful! To get a longer flake, you need to strike along a natural ridge in the rock and then you can strike the newly made ridge again to get another, better knife blade.The only drawback is that the edges of the blades are fragile (the more blades you make, the better off you'll be) so, you can cut meat but not something hard like wood. If you’re dealing with wood, it’s better as a scraper.


