The Basics of Land Navigation
The Basics of Land Navigation

By Adelia Ladson
Knowing how to navigate is one of those skills that you need to have in your toolbox of knowledge. It ranks up there with building a fire and finding potable water. If you plan on spending anytime out in the wilderness, whether you're hiking or hunting, you need to know the basics of land navigation.
Where Do I Start
The place you need to start is knowing how to determine where you're going and to do this, you need to know in which direction North, South, East and West is located. The easiest way to do this is with a compass but there are a couple of ways that you can do it if you're in a situation where you don't have a compass on you. You can determine direction using the sun or the stars.
How to Use the Sun for Directions
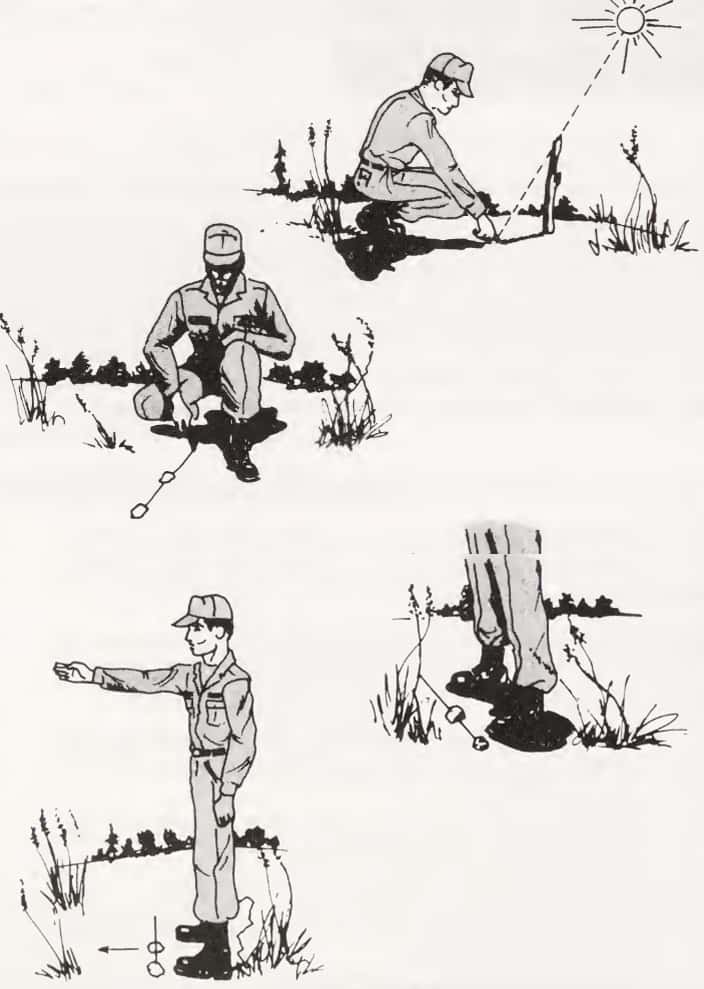
The first thing to keep in mind is that the sun rises in the east and sets in the west no matter where you are on the planet. With a stick about three-foot long and its shadow, you can find North and the South. Here are the steps:
|
1. Find a stick that's fairly straight and a clear place where the stick will cast a shadow. 2. Place the stick upright in the ground and then mark the tip of the shadow cast by the stick. It will take about 10 to 15 minutes for the shadow to move about 1 1/2" to 2" and when it does, mark the tip of the shadow again. 3. Draw a line from the first mark to the second mark, extending it about a foot beyond it. 4. Now, stand with your left foot on the first mark and your right foot on the end of the line that you drew. If you're in the Northern Temperate Zone, which is between the Arctic Circle and the Tropic of Cancer, you'll be facing North. If you're in the Southern Temperate Zone, which is between the Antarctic Circle and the Tropic of Capricorn, you'll be facing South. You can determine the rest of the directions by their relation to North or South. |
How to Use the Stars for Directions
From the earliest times, sailors navigated using the stars and, as the stars are constant in the night sky, you can, too. Depending on whether you're North or South of the Equator, you'll be looking for either the Little Dipper or the Southern Cross group of stars.
The Little Dipper
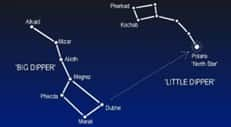
The Little Dipper is located in the far northern sky, and it contains Polaris, commonly called the North Star. It's the brightest star in the group of stars and the end of the "handle" of the Little Dipper. Since it's less than one degree from the North Celestial Pole, it will always show you which way is North. Here's how to locate the Little Dipper and the North Star.
|
The Little Dipper is often difficult to see so to find it, look for the Big Dipper instead. This group of stars is one of the most easily recognizable and visible in the Northern sky. To locate the North Star, look at the two stars that make-up the right side of the Big Dipper's bowl then draw a line connecting the two stars and continue following it up until you reach the North Star. These "pointer" stars in the Big Dipper literally point to the North Star. |
|
The Southern Cross
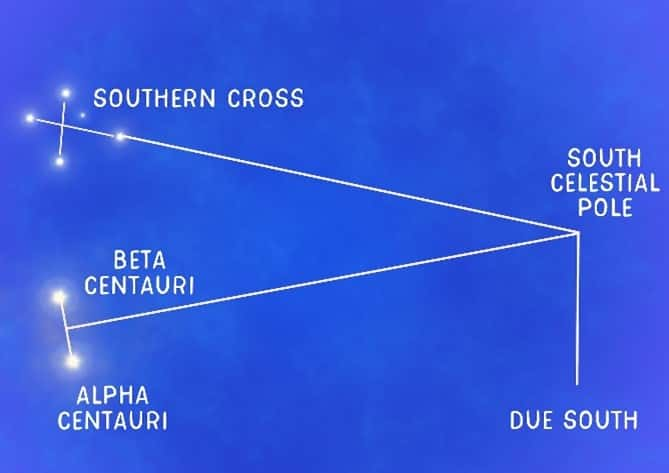
In the Southern sky, you'll see the constellation Crux, which contains the group of five stars called the Southern Cross. This is the most recognizable group of stars in the Southern sky because it has some of the brightest stars and is in the shape of a cross that's tilted to one side. It, along with two pointer stars called Alpha and Beta Centauri, will point you toward the South Celestial Pole. Here's how to use them:
|
1. Look at the two stars that form the long axis of the Southern Cross and find the two bright pointer stars, which will be to the left of it. 2. Draw a line with one finger connecting the long axis of the cross, extending out and with your other finger draw a line between the pointer stars, extending up and out. The point where your two fingers meet will be the South Celestial Pole. Find a landmark on the horizon directly below that point in the sky and that will be your marker for which way is South. |
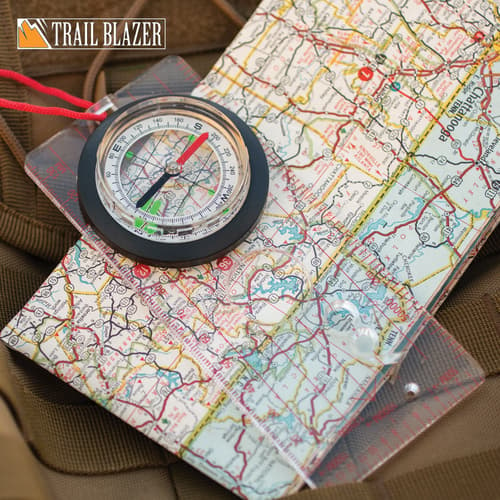
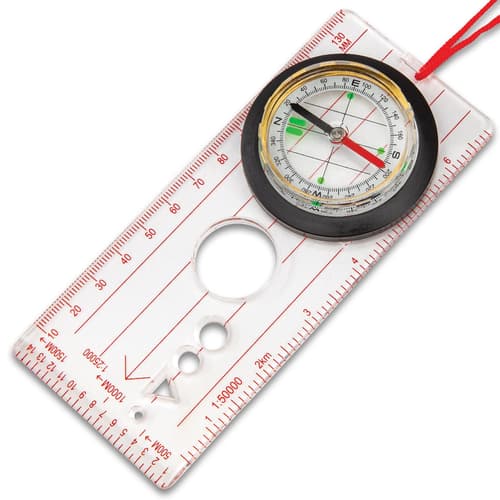
How To Use A Compass for Directions
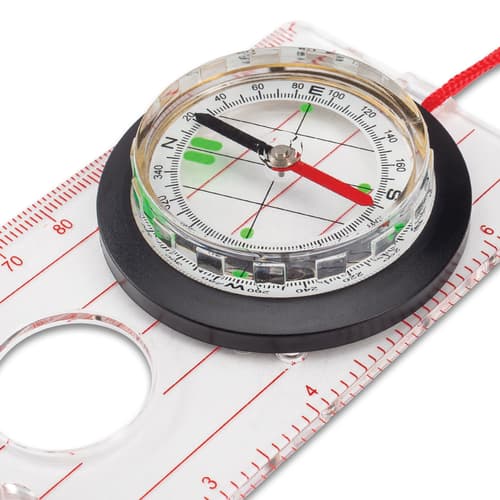
The first thing that you need to know, if you do not already, is that a compass doesn’t point to what is termed as "True North". It points to what is called “Magnetic North” and the term “declination” is the difference between the two. The needle of the compass is always going to point Magnetic North, regardless of what letter it’s pointing to at the moment, since it aligns with the Earth’s magnetic field. When you look at a compass, aside from the directions North, South, East, West and all the in-betweens, you will see 360 degrees marked off, as well. These degrees are what you use to take your bearing from when you are using a map and a compass together, which I'll address below.
When simply following a compass in one direction, without using a map, it’s essential that you follow it without deviation. Remember, the direction that the needle is pointing at is not necessarily the direction that you’re facing. This is actually a very common mistake. So, the first thing is to do just what was stated above: turn the compass until the needle is pointing at the “N”. Considering the terrain you may be traveling over, following a direct line could be incredibly difficult. You need to pay attention to the surroundings from where you start all the way to your destination. Keep your eyes open and enjoy the scenery but make sure to make a mental note of landmarks and prominent features along the way. If you have managed to stick to a straight path, to get back to where you started, just turn your compass around and read it. Now, you will read the South needle as your North. This gives you the reversal of direction that you need to retrace your steps back to where you started from.
What's Next?
Now that you know where your four directions are, you need to know where you are and how to get to where you want to be. There are two tried and true ways to do that when you don't have a GPS: Triangulation and Dead Reckoning.
Triangulation
Let's start with where you are and how to determine that. Triangulation is using three landmarks around you and then determining where you are on a map. When you calculate the exact direction of each of the landmarks and how they're relative to where you are, you can pinpoint where on the map you're standing. Here are the steps:
- Identify three landmarks in the area and identify them on your map. Look for prominent features in the landscape like peaks, gullies, lakes, ridgelines and bends in a river that will coincide with features on your map.
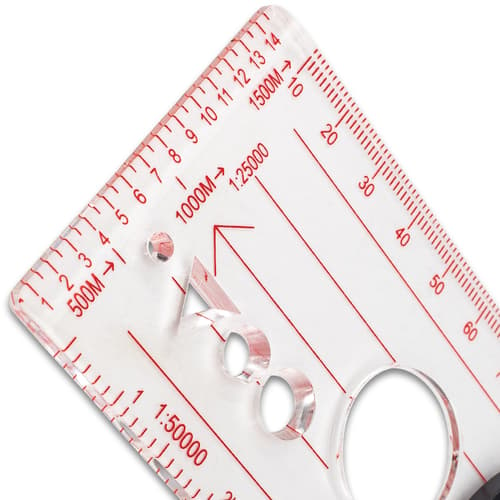
- Now, take your compass and map and adjust for the magnetic declination of the area that you're in, as there will be a difference between the map's North and North on the compass. Most maps will show this declination (the difference between the two) for the specific area so that you can make the adjustment when taking a bearing. It should be on the side of the map somewhere, possibly, in a box and it will show you the degrees of variation that you need to account for when making your direction or "bearing" calculations.
- NOTE: If you’re in the Appalachian Mountains where there’s no variation at all because True North and Magnetic North are in alignment. It sits on an agonic line, which runs through Lake Michigan all the way down to off the coast of Florida.
- Lay the map on level ground so that North on the map and North on the compass are pointing in the same direction. If you’re East of the aforementioned agonic line, the variation will be to the West and if you’re West of it, the variation will be to the East. If your map says the declination is 35 degrees West, then you need to rotate your map that many degrees clockwise so that your compass needle is showing a heading of 35 degrees to the west of the North grid lines on the map. If it says 35 degrees East, just rotate it counterclockwise.
- Once your map and compass are on the same page, so to speak, you can take your bearing. Hold your compass flat in front of you and point the direction of travel arrow at the landmark. Then turn the compass dial until the magnetic needle’s red end is in the orienting arrow’s column on the bevel or needle housing. In hiking parlance, this is often referred to as “putting red in the shed.” Look at the degree marks on your compass and see at what degree the landmark is located at on the compass. For example, if you’re using a mountain peak as your landmark, and it is at 145 degrees, you can draw a long line on the map from the representation of the peak at a 145-degree angle. You now have your line of position (LOP). You are located somewhere along this line. To find out where you are on the line, find another landmark that also can be found on your map. Repeat the process of getting its degrees on the compass and draw another line on the map from it at the angle of its degrees and then repeat with the third landmark. Make sure that you draw the lines long enough to intercept your first line. The intersections of these lines is where you’re located.
Dead Reckoning
Basically, navigation started with Dead Reckoning, which is the idea that if you go in a direction for a specific distance, then you must be wherever the place is that is the specific distance in the direction from where you started. So if you go south from your starting position for one mile, then you're one mile south of your starting position. In dead reckoning, it's important to know where you're starting from before you start walking and then keep up with the distance that you've traveled and the direction you're traveling in. To stay on target to your goal, you can continue to look for prominent landscape features that coincide to features on your map.
The two basic elements of dead reckoning are direction and distance and since we already have direction covered, let's talk about distance. You need to be able to compute the distance that you've traveled, in the direction that you're going. There are two ways to do this and one of them is by using the formula: distance = speed x time traveled. If formulas scare you like they do me, the other option is by pace count, which is counting the number of paces that you take and using that to determine how far you've gone.
Dead Reckoning by Pace Count
When you're walking, counting paces is usually the most accurate method of measuring the distance that you've traveled. Consider one pace to be each time your right foot hits the ground. If you count every individual step, you will have to do twice as much counting. To translate pace into distance, you need to know how many paces you walk in one mile. There are a few different ways to mark out a mile to test on so whatever works best for you. When you walk that test mile, make sure that you just walk naturally, being sure not to take exaggerated steps. Count the paces as you go and at the end of the mile, you'll know how many paces it takes for you to walk a mile. Then, just keep that number in your brain's file cabinet for future use.
When you're using pace count for dead reckoning, there are some things that will affect your pace count. Walking uphill will increase your pace count and walking downhill reduces it and if you're walking into the wind, your pace count increase while a wind at your back reduces it. Also, carrying a heavy load will increase your pace count and rough terrain like a swamp, thick brush and soft sand will increase your pace count. If you're navigating at night, you will take more steps to cover a certain distance because you can't see well.
To help you keep up with the distance that you've walked, you can put a few items in one of your pockets like pebbles or twigs and then every time that you walk one mile, move the item to the other pocket. In this way, you can see how many miles that you've walked, based on how many items are in the pocket that you've been transferring to. Just don't mix the pockets up.
NOTE: Only count paces that contribute to your forward progress, not paces while you're bypassing obstacles, which means that you're walking perpendicular to your destination. The purpose of counting paces is to determine your actual forward distance traveled.
It's important to mark your position on your map, with a pencil, about every 15 minutes to assure that you're heading in the right direction. Based on how well you keep track of the distance you've traveled and have maintained your intended direction, your position will be reasonably accurate. It likely won't be your exact position but it will be pretty close. However, the longer you go without a definite position, the greater the possibility of error in your navigation. So, it's important to also use triangulation periodically to mark your exact position and have prominent terrain checkpoints marked on your map to fix your position by terrain association.
Final Notes on Land Navigation
The keys to success in land navigation are starting out correctly, paying close attention to your surroundings and not rushing through your navigation calculations. When you're traveling cross country, you should use a combination of dead reckoning and triangulation to keep you on the right path and assure that you reach your intended destination. Also, frequently check your compass while you are walking to make sure that you're heading in the right direction, especially, after you've had to bypass an obstacle in your way.