Basic First Aid Skills You Should Know
Basic First Aid Skills You Should Know
By Adelia Ladson
My brother told be about a time that he was out eating in a restaurant and a child, at the next table, started choking. The parents of the child just started hopping around yelling for help, as it was obvious that they didn’t know what to do. My brother calmly got up, performed the Heimlich Maneuver and saved the child.
I found this story to be very disturbing, especially in this day and age, as this technique has been around for decades and hasn’t exactly been kept a secret. I heard about it at school, saw it on posters everywhere, learned it in Girl Scouts and saw it performed on television shows. I just couldn’t fathom why the parents of that child didn’t know what to do for choking. This made me wonder if there were other basic first aid skills that I take for granted and assume that everyone knows them. That being said, here are the basic first aid skills that, at the very least, you should know.
Why Do I Need To Know Them?
Just like the story above, a medical emergency can happen anytime, anywhere. You cut yourself severely in the kitchen. Your child falls out of a tree in the backyard and breaks an arm. A coach falls out and stops breathing at a Little League game. You’re not taking the place of a doctor or emergency personnel, you are taking steps to provide aid until professional medical assistance arrives or is reached. In life or death medical emergencies, your aid could give the victim a fighting chance. I’m going to break-up the basic first aid skills into two categories: common and uncommon.
Common
These are first aid skills for medical emergencies that you will most likely encounter in your lifetime. These are things that you probably know and just do automatically. However, there are some skills that may take some thought and be remembered.
The Heimlich Maneuver
Of course, I’m gonna start with the Heimlich Maneuver. As long as children and hard candy exist, there’s going to be choking incidents. Both my brother and I choked on hard candy when we were children and were rescued by our parents with this basic first aid skill.
To perform the maneuver, stand behind the individual, hold them firmly around the waist and tip them forward. Make a tight fist, place it just above the person’s navel and then grasp the fist with the other hand in a tight grip. With a rapid, upward thrust, push hard into the individual’s abdomen between six and 10 times until the blockage is dislodged. For a pregnant woman or larger than average person, adjust hold so that hands are at the base of the breastbone, above the lowest ribs.
Being alone and facing a choking scenario can be very frightening, however, staying calm and realizing that steps can be taken, is key. The Heimlich Maneuver can be performed on oneself using the same fist and hand position above the navel and, then, bending over a hard surface like a chair to help leverage the upward abdominal thrusts.
Stopping Bleeding
The most common first aid skill that people perform throughout their lives is stopping bleeding. It’s a sharp world out there and everyone is bound to be cut multiple times in a lifetime at home, recreation or work. This skill is something that you may just know how to do automatically but here is the official run-down.
When there is a minor cut or laceration, capillaries, which are small vessels, are the source of the bleeding that occurs. Capillary bleeding is the easiest to treat and control. Controlling bleeding with direct pressure is the most effective way to treat a wound. Use whatever cloth is on-hand to apply to the wound and hold firmly with a steady pressure for 30 minutes.
Sprains
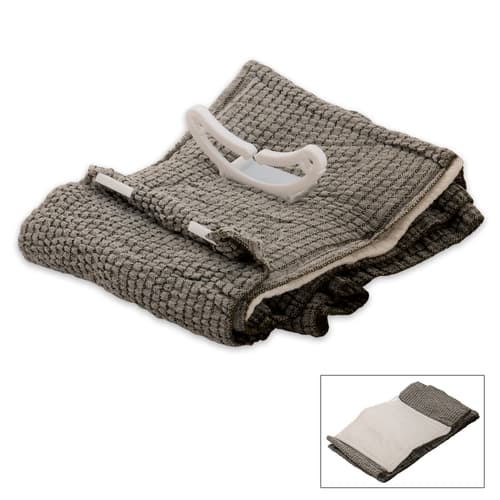
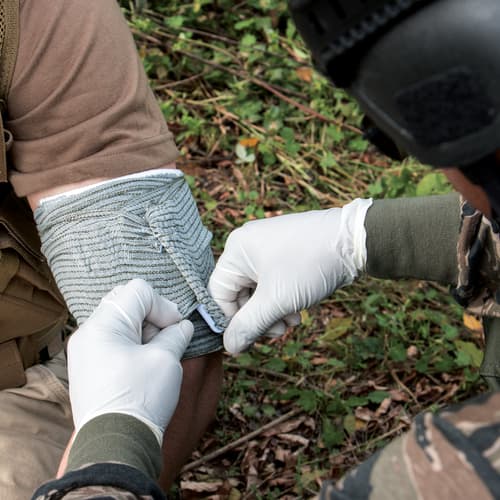
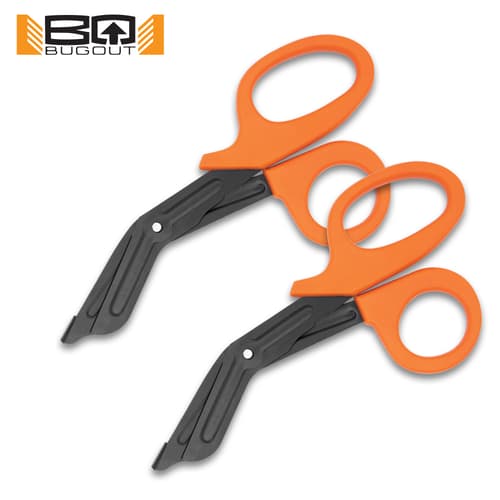
If you’ve ever played sports on a team or in the backyard, you’ve had a sprained wrist, ankle or knee. It’s the nature of the game and play, so to speak. If by some chance, you’ve never had a sprain in your life, but your kids are playing sports, you need to know how to take care of this type of injury after it first happens. Sprains can be treated rather easily. The sprained area whether, ankle, knee or wrist needs to be immobilized by wrapping it with something. Most likely, there will be a first aid kit available (an absolute necessity for house and vehicle) with an elastic bandage in it. However, a length of cloth or bandanna can be used in a pinch. Wrapping the sprain tight and elevating it above heart level will help with the swelling. Also, applying cold water, if available, will help with swelling. The most important thing is that the individual needs to keep from putting further strain on the injured area.
Insect Stings
I don’t think you ever forget the first time that you were stung by a bee or a wasp. It usually happens when you’re a child and the initial shock of it is a little traumatic. So keeping that in mind, if you’re tending a child, stay calm to help deescalate the situation and start the soothing process. Another reason to stay calm, if stung by a wasp or hornet, is that they can sting again and will if they’re threatened by arm-waving. Just calmly walk away or walk the victim away from the area to avoid further attacks. The first thing to do is to see if a stinger was left in the wound and then scrape across it with your fingernail to remove it. Never use tweezers to remove it because squeezing the stinger will release more venom into the wound. Wash the area with soap and water and then apply a cold pack to reduce the swelling. If this is a first time bee sting, you need to watch for signs of an allergic reaction. Signs include swelling in the face or neck, difficulty breathing, nausea, dizziness or hives. If there are any signs, seek medical attention immediately. In the aftermath, you can give an over-the-counter pain reliever for the pain.
Bone Breaks
Not a small medical emergency by any means and one that requires a trip to the ER, broken bones are actually fairly common. There are first aid treatments that can be done at the scene of the accident and there are things that you need to know about breaks.
There are two kinds of fractures that can occur – an open fracture and a closed fracture. The closed fracture is when the bone is broken but there is no open wound, and an open fracture is when there is an open wound and possibly a bone protruding from the break.
Both of these types of breaks need to be immediately immobilized because moving a broken limb too much could result in severing a major blood vessel or in pinching a nerve. You need to splint-up the limb or digit by wrapping it with cloth or an elastic bandage with a piece of wood or stick on each side of the break so that it can’t bend. You can also buy a pack of already made splints that come in sizes from finger to leg to keep in your first aid kit. Make sure that the splint is not so tight that it cuts off circulation and make sure that it hasn’t tightened too much from the swelling that will occur. Doing this, before you get the victim to the ER or before the ambulance arrives will help reduce the chance of further damage to the limb or digit.
Uncommon
Just because you may never use the basic first aid skills below, they are no less important to have a working knowledge of. It’s always better to be prepared than not.
Profuse Bleeding
Profuse bleeding is a whole different world than the deep cut you might get cutting vegetables and can be one of the most dangerous medical emergencies to face. There are two types of severe bleeding: arterial and venous. When an artery is cut, this is called arterial bleeding and it can result in significant blood loss because blood will spurt out every time the heart beats. When a vein is lacerated, this is venous bleeding, and it can be much easier to control.
As mentioned before, controlling bleeding with direct pressure is the most effective way to treat a wound. However, when an artery or vein is damaged, applying a tightly wrapped bandage to the wound is a must to increase the pressure and force the blood to clot at the source. The bandage can be an elastic bandage, a length of cloth or a bandana tied with paracord but not tight enough to impair circulation in the other parts of the limb. Elevating the injured area above the heart’s level can slow bleeding down and return blood to the heart. If an artery or vein is visible, however, apply pressure with the finger at the severed or lacerated end of it until the blood flow slows enough to apply a bandage. This is where immediate first aid treatment could save someone’s life.
Treating Shock
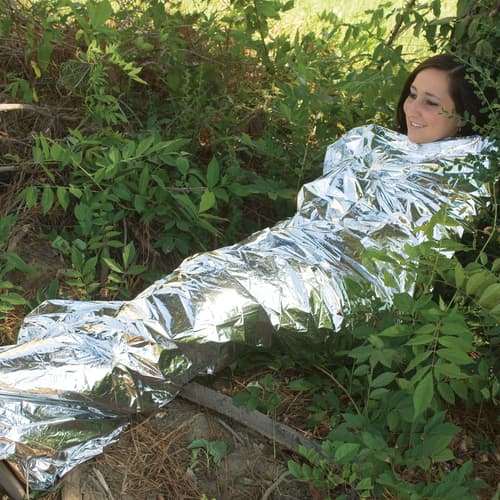
This is a good place to put in this basic first aid skill as one of the things that adds to the danger of profuse bleeding is that the victim will most likely go into shock. It occurs when there is insufficient blood flow in the body, which means oxygen is not being carried into the tissues, especially, the vital organs. There are a variety of situations that causes this to happen including heatstroke, blood loss, allergic reactions and poisoning.
Whenever an injury or medical emergency occurs, monitor the individual’s vital signs like breathing, temperature and pulse. Watch for signs of shock like enlarged pupils, clammy skin, rapid breathing and pulse, anxiousness and nausea. If the individual goes into shock place them flat on the ground, if possible, elevate the legs to help circulation and loosen tight clothing. Then, keep the individual calm and warm until professional medical assistance arrives or is reached.
Heat Stroke
You probably have suffered or have seen heat exhaustion, but it never progressed into life-threatening heat stroke. When a person is overexposed to the sun and heat or engages in intense physical activity in hot weather and their core body temperature rises to 104F or higher, heat stroke occurs. Immediate action to cool the individual down must be taken or the brain, heart, kidneys and muscles can be quickly damaged and cause death. Signs of heat stroke are a throbbing headache, rapid or strong pulse, nausea or vomiting and red, hot, dry skin. The individual will stop sweating altogether and may lose consciousness.
Make sure the person is sheltered from the sun or taken indoors immediately and remove excess clothing. Apply water to the skin to cool the body down by whatever means are available. A cool tub of water would be the best possible scenario while you’re waiting for emergency assistance. However, cold, wet towels or ice on the person’s head, neck, armpits and groin will work, too. If the person is conscious, give them water to drink but do not try to force water into someone who is unconscious.
Hypothermia
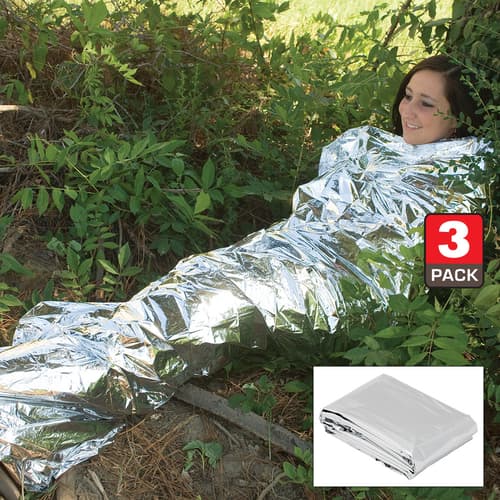
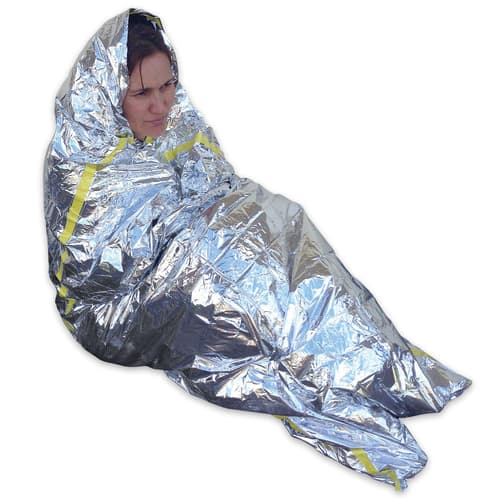
At the other end of the spectrum is hypothermia, which is pretty much exactly the reverse of heat stroke. It can occur quickly from overexposure to the cold and is hastened by overexertion in cold weather, which causes your core body temperature to fall below 95F. If not treated, it can lead to heart and respiratory system failure and death. Some signs of hypothermia are shivering, slurred speech, weak pulse, shallow breathing and drowsiness.
The victim needs to be brought inside as soon as possible and any wet clothing needs to be removed and replaced with warm blankets, while you’re waiting for professional medical help to arrive. You can also apply a warm compress like warm water in a plastic bottle or a dryer-warmed towel to the neck or chest. Don’t, however apply to the legs or arms because this forces cold blood back toward the heart, lungs and brain. Also, don’t use direct heat like a heating pad or heating lamp to warm the victim as extreme heat might cause irregular heartbeats so severe that the person goes into cardiac arrest. If the person is alert and able to swallow, you can give them something warm to drink. Make sure that the beverage is non-alcoholic and decaffeinated.
CPR
I hope that you are never faced with a medical emergency where CPR (Cardiopulmonary Resuscitation) is required but you need to be prepared just in case. I believe that everyone should go through a CPR class at least once but taking a class every couple of years is truly the best decision an individual can make to stay knowledgeable and up-to-date. Here are the steps, in a simple, concise format, based on the American Heart Association guidelines.
This may seem strange but the first thing to do is actually, verbally ask the individual if they are okay while tapping them on the shoulder, just to make sure that they need CPR. The next thing is to make that very important call to 911 or have someone else make the call.
Once it’s deemed that the individual is in trouble, their airway needs to be opened by carefully positioning them flat on their back, tilting their head back and slightly lifting their chin. At this point, check for any signs of breathing by listening carefully for about 10 seconds. If they aren’t breathing, begin CPR. Occasional gasping does not count as breathing.
Chest compressions are the vital life-saving part of CPR because they are the means to get the blood and oxygen flowing again to heart and brain. The heel of one hand needs to be placed in the center of the individual’s chest, which is over the lower half of the sternum, and the heel of the other hand is placed on top so that the hands are overlapped and parallel. Apply forceful and rhythmic downward pressure to the chest at a rate of 100 to 120 compressions per minute at a depth of 2” for an average adult. Don’t lean on the chest when performing the compression but allow the chest wall to fully recoil. The movement should be quick and rhythmic like a heartbeat. Since fatigue can occur, while performing the compressions, the ideal situation is to have two rescuers so that a switch between the two can be made about every two minutes. The American Heart Association advises that an untrained individual can provide chest compressions, at the very least, to give the victim a fighting chance until help arrives.
The second part to CPR is that a rescue breath can be delivered to the victim at a compression-to-breath ratio of 30 compressions to two rescue breaths. First, making sure the victim’s airway is open, the rescuer should pinch the victim’s nose and make an airtight seal over the victim’s mouth with their own. If the mouth is damaged or can’t be opened, make an airtight seal over the victim’s nose instead. Don’t take a deep breath to blow into the victim’s mouth because this could over-inflate their lungs. A normal breath given over one second is sufficient to make the chest rise and should be done twice in a row. However, if the chest does not rise, make sure the victim’s airway is still clear, repositioning the head and tilting the chin up again. The chest should rise visibly with each rescue breath.
The main reason for the rescue breaths is to try and maintain oxygen in the blood. However, when someone goes into sudden cardiac arrest, the oxygen content is still at an adequate level during the first several minutes. It is critical to start the chest compressions first before worrying about rescue breathing. Once again, the compressions are what get the oxygenated blood flowing again to the heart and brain. When an individual is in cardiac arrest for a while or is a victim of drowning, it is important to integrate the rescue breathing as oxygen content in the blood will already be dangerously low at that point.